

Introduction
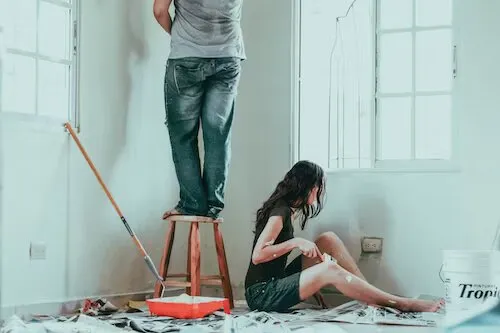
Painting a room yourself can be a fun, rewarding project that allows you to customize your home and add your own personal touch. While hiring a professional painter is always an option, DIY painting has some great benefits:
- Save money - Painting a room yourself is significantly less expensive than hiring a pro. You'll just need to pay for paint and supplies versus labor costs.
- Learn useful skills - Painting teaches you skills like prepping surfaces, using painting tools, choosing colors, and applying paint properly. These are handy lifelong skills for maintaining your home.
- Express creativity - When you paint it yourself, you can get creative with specialty techniques like sponging, rag-rolling, or accent walls. Make it match your personality.
- Work on your timeline - With DIY, you can paint when it fits your schedule rather than waiting weeks or months for a professional painter.
- Control the process - You choose the paint colors, sheen, brands, and methods. Plus you don't have to coordinate schedules or be home for access.
So if you want to save money, learn new skills, get creative, work on your own timeline, and control the entire painting process, doing it yourself is likely the best option. This guide will walk you through the entire DIY room painting process from start to finish.

Plan Your Project
Planning well before you start painting will help ensure a smooth, successful DIY paint job. There are several key things to think about and decisions to make during the planning stage:
Choose Paint Colors and Finishes
- Decide on the color palette for the room. Select 1-2 main wall colors and accent colors for trim/doors if desired. Get paint swatches and samples to view colors in the room before committing.
- Consider the wall finish - flat, eggshell, satin, semi-gloss, or high-gloss. Flat or matte is good for hiding imperfections but not durable. Eggshell is slightly glossy and more washable. Satin is versatile with medium gloss. Semi-gloss and gloss are shiny, reflective finishes best for high-moisture areas.
- For the ceiling, flat or matte finishes are common as they hide imperfections well.
Calculate How Much Paint You Need
- Measure the room’s wall space to find the total square footage you’ll be painting. Include all walls and ceiling.
- Check the paint can for expected coverage per gallon. Most quality interior paints cover around 400 sq ft per gallon with one coat.
- Divide your total square footage by the paint's coverage rate to determine how many gallons you need. Round up if the number isn’t a whole gallon.
- It's better to have extra than to run out of paint halfway through the job. Consider buying an extra gallon if your calculations are close.
- Factor in a second coat and any accent walls that might use more paint than a standard wall space.
Choose Paint and Supplies
- Select high quality interior paint designed for the type of space you're painting - eggshell or satin finish latex paint is a good versatile option.
- In addition to paint and paintbrushes, pick up supplies like drop cloths, painter's tape, a paint tray, roller, roller covers, paint sprayer (optional), primer, spackling paste, sandpaper, and more.
Prepare the Room
- Completely clear the room of furniture and wall hangings or cover immovable items with drop cloths.
- Clean the walls thoroughly to remove any grease, dirt, or grime. Fill any holes or cracks with spackling paste.
- Lightly sand glossy areas to help the paint adhere. Wipe away any dust with a tack cloth.
- Tape off edges, trim, electrical outlets, and door frames with painter’s tape. Spread drop cloths.
- Prime bare drywall, patched areas, or if changing paint colors dramatically. Allow primer to fully dry.
Prep the Room
A proper prep is crucial for achieving a professional paint job. Start by giving the walls a good cleaning to remove any dirt, grease or grime. Use a sponge and dish soap, or a degreaser if needed. Rinse thoroughly and let dry.
Next, fill any holes or imperfections with spackle or joint compound. Allow to fully dry and then sand smooth. Carefully remove any dust.
Use painter's tape to mask off trim, moldings, ceiling, floors, outlets and switch plates. Delicate surfaces like wallpaper should be masked off to prevent peeling or tearing from paint splatter. Take your time with the taping to prevent drips and bleeding.
The room is now prepped and ready for painting. With a proper prep work, you'll achieve an even coat of paint that looks professionally painted.
Paint the Ceiling
Painting the ceiling first is the best approach when tackling a room. Start by assembling your extension pole and attaching a high-quality roller cover. Use a pole that extends at least 2-3 feet longer than your height so you can reach the entire ceiling without needing a ladder.
Dip the roller into the paint bucket and roll it against the ridge of the bucket to distribute the paint evenly across the roller. Position the pole at an angle to reach the ceiling and apply long back and forth strokes to cover the entire surface area. Overlap each stroke by a few inches to ensure even coverage.
Focus on painting a 2-4 inch border around all edges of the ceiling first. This will help blend the walls and ceiling for a smooth transition. Work from one end of the room to the other in a systematic grid pattern. Apply a thin and even coat using medium pressure, lifting at the end of each stroke.
Avoid pressing too hard or overloading the roller with paint to prevent dripping. Periodically reload the roller with more paint as needed. Look for any missed spots and touch up if needed. Allow the ceiling paint to fully dry before moving on to the walls, usually in 2-4 hours.
Paint the Walls
Cutting in the edges and corners is one of the most important parts of painting a room. Use a high-quality angled brush to paint a 2-4 inch border along the ceilings, baseboards, windows, and doors. Hold the brush at a 45 degree angle and use smooth strokes to create straight edges. Take your time and don't rush this part.
Once the edges are cut in, you can start rolling the paint onto the walls using a high nap roller cover. Pour some paint into a tray or bucket and load the roller by rolling it back and forth until it is fully saturated. Start near a corner and roll up and down in "W" or zig zag motions, moving over a few inches after each pass. Apply even pressure as you roll to create a uniform finish. Start from the top and work your way down, completing one wall section at a time. As you go, make sure to blend in edges of the rolled sections to create a seamless look. Refill the roller often to ensure it stays wet and reaches into corners.
Change directions as you roll and work methodically until the entire wall is covered. Make sure to get into corners and along edges. Don't overwork the paint or press too hard, which can leave marks in the finish. Step back periodically to inspect for missed spots. Touch up any areas that need more paint. Allow ample drying time according to manufacturer guidelines before adding a second coat or moving on to the next step. Proper technique when painting the walls will lead to a smooth, professional looking paint job.
Doors and Trim
When painting a room, you'll want to remove the doors and door hardware to paint them separately. This allows you to fully coat the door edges and achieve an even finish. Lay doors on saw horses or across a couple chairs to elevate them off the ground for painting.
Use a small angled trim brush to cut in around the edges where the trim meets the walls and ceiling. For baseboards, remove any floor vents or outlet covers first, then carefully run the brush along the top edge and down the sides. Use long, fluid strokes and don't overload the brush. For door and window trim, cut in the edges with the trim brush, then use a mini roller to coat the middle portions of the trim. Allow the trim paint to dry fully before moving on to rolling the walls.
Applying primer and paint properly to doors, baseboards, and trim creates a polished, professional look. The extra attention to detail really makes trim stand out. Just be patient, take your time cutting in edges, and remember to reattach hardware once fully dry. Crisp, clean trim elevates the entire paint job.
Clean Up
After you finish painting each wall, thoroughly clean your paintbrushes and supplies to ensure they last and perform well for future projects. Here are some tips for cleaning up:
- Clean paintbrushes thoroughly after each use. Use paint thinner or mineral spirits to clean oil-based paints from brushes. For water-based paint, rinse the brushes with warm water and soap until the water runs clear. Gently comb the bristles to remove any remaining paint.
- Reshape the bristles into their original tapered form after cleaning. This helps maintain the brush's shape. Store brushes upright in a jar or hanging to allow air circulation for faster drying.
- Be sure to clean any paint spills right away. Use a damp cloth to wipe up wet spills before they dry. For dried paint, scrape off what you can with a plastic putty knife or paint scraper, then wipe with a damp cloth. Avoid abrasive scrubbers as they can damage the surface.
- To deal with paint drips, wait until the paint is completely dry, then carefully peel off the drip with your fingernail, a plastic putty knife, or a paint scraper. Be gentle to avoid damaging the surface underneath.
- For spills on yourself, use mineral spirits, paint thinner, or soap and water to remove paint from skin quickly before it dries. To remove paint from clothing, allow it to dry first, then gently scrape off excess paint. Follow up by laundering the clothing.
Properly cleaning your painting tools and dealing with spills will result in a tidier workspace and better results for your DIY paint projects. Taking the time to clean thoroughly makes your brushes, rollers, and other tools last longer too.
Second Coat
After the first coat is completely dry (typically 24-48 hours), do a walkthrough to spot any missed areas. It's common to find edges, corners, and trims that need touched up after the initial coat. Use a small brush to carefully paint any missed spots.
Before applying the second coat, lightly sand any drips or bumps with fine grit sandpaper to smooth them out. Vacuum the dust.
When applying the second coat of paint, use a light touch and work in the opposite direction as the first coat. For example, if you painted vertically for the first coat, paint horizontally for the second coat. This helps ensure an even application.
The second coat may only require one dip of the roller into the paint tray for each wall section. Roll lightly and evenly to create a smooth, uniform finish.
Allow the second coat to fully dry as well before rehanging doors, outlet covers, etc. Proper dry time ensures the paint has hardened completely and will not scratch or imprint.
Add Finishing Touches
After painting the walls and ceilings, you'll want to complete your room by adding some finishing touches. This includes putting back any items you removed before painting like outlet covers, switch plate covers, vent covers, lighting fixtures and doors.
Replace Outlet Covers
- Carefully remove any painter's tape from around outlets, switches or vent covers. Make sure the paint is completely dry first.
- For outlet covers and switch plates, use a screwdriver to remove the screws holding them in place. Set the screws aside in a safe spot.
- Wipe down the outlet covers and switch plates to remove any paint drips or splatters.
- Replace any old, cracked or damaged outlet covers and switch plates with new ones. Make sure they fit snugly.
- Insert the screws back into each outlet cover and switch plate and tighten them with a screwdriver. Don't overtighten them.
Rehang Doors
- Once the paint on the door trim and door is fully dry, you can rehang interior doors.
- Start by inserting the hinge pins back into the door hinge holes one at a time. Have someone support and lift the door as you work.
- Once the hinge pins are in place, make adjustments so the door fits back into the doorway properly. You may need to gently tap the pins in or out so the door sits squarely and latches properly.
- For exterior doors, replace any weatherstripping that was removed before painting. Make sure the weatherstripping creates a tight seal.
- Reinstall any door hardware like doorknobs, locks, handles and kick plates using a screwdriver.
- Test opening and closing interior and exterior doors to make sure they glide smoothly and close securely without rubbing against the door frame. Adjust the hinges if needed.
Maintain Your Paint Job
Freshly painted walls look beautiful, but it's important to care for them properly so they maintain their just-painted look over time. Here are some tips for keeping your walls looking their best:
- Allow paint to fully cure before cleaning - It takes about 30 days for paint to fully cure and harden. Avoid scrubbing or washing walls during this time. Just dust gently instead.
- Use gentle cleaners - Avoid abrasive cleaners on painted walls. For cleaning painted walls, use a mild cleaner like dish soap mixed with warm water.
- Dust regularly - Dusting every 1-2 weeks will prevent dust buildup that can dull paint over time. Use a microfiber duster and go lightly over walls.
- Spot clean stains - For any stains or marks that occur on walls, spot clean them right away. Dampen a clean cloth with warm water and mild detergent and gently wipe the area.
- Fix nicks and scratches - Address any nicks, chips or scratches on walls as soon as possible. Use touch up paint to quickly fill them in before they become bigger issues.
- Repaint high-traffic areas - High traffic areas around doorways, hallways and entryways may need repainting more frequently as the paint wears from repeated touching and bumping. Plan to repaint these areas as needed.
- Wash walls annually - About once per year, do a gentle washing of walls using warm water and mild soap. This removes dust, grime and other buildup. Just don't over-scrub.
Following these tips will help keep freshly painted walls looking like new for as long as possible. With proper care, your paint job will maintain its beauty and last.
For more DIY tips and tricks, DIYwithHelp have got you covered…
If you need some professional guidance for your project, be sure to sign up for a free account with DIYwithHelp.com. Once you have an account, you can search our site (or fill out a project request form) and connect with expert tradespeople who are willing to lend their advice over scheduled video-calls.


