


By DIYwithHelp Writing Staff
What Are Studs and Why Do You Need to Find Them?
Studs are the vertical framing elements that form the structural skeleton of your walls. They are typically made of wood or metal and run from the floor to the ceiling, spaced 16 or 24 inches apart. The primary purpose of studs is to provide support and anchoring points for drywall, cabinets, shelves, and other heavy objects that need to be securely mounted to the wall.
Finding the location of studs is crucial when you need to hang heavy items like mirrors, televisions, or shelving units. Attempting to secure these objects directly into the drywall without proper stud anchoring can result in them eventually pulling away from the wall and causing damage or potential injury. Locating studs is also essential for any renovations or DIY projects that involve cutting into or modifying the existing wall structure, such as installing recessed shelving or running new electrical wiring.
Traditional Stud Finding Methods
Traditional methods for locating studs behind drywall rely on keen observation and simple tools you likely have at home. One of the most common techniques is the "knock method," where you gently knock or tap along the wall surface, listening for a solid sound that indicates you've hit a stud. Studs are the vertical wooden framing members, so they'll produce a deeper, more resonant knock compared to the hollow sound of the drywall alone.
Another method involves using a strong magnet to locate nails or screws in the drywall, which often indicate a stud's position. Slowly drag the magnet horizontally across the wall, and it will be drawn towards any metallic fasteners securing the drywall to the underlying studs.
You can also visually inspect the wall for subtle signs of stud locations. Small dimples, bumps, or holes in the drywall surface (often called "nail pops") may reveal where nails have been driven into the studs during construction. Additionally, look for seams in the drywall, as these are sometimes installed so the edges meet over a stud.
While these traditional techniques can be effective, they require some practice and may not always provide a clear or accurate stud location, especially in older homes with irregularities in construction. Patience and a methodical approach are key when relying on these manual methods.
Using a Stud Finder Without a Stud Finder Tool
While dedicated stud finder tools are convenient, there are several methods you can use to locate studs in your walls without any special equipment. These techniques rely on observation and simple household items.
The Knock Method: One of the simplest ways to find studs is by knocking on the wall and listening for a solid sound. Studs are typically spaced 16 or 24 inches apart, so start knocking at one end of the wall and move horizontally, tapping every few inches. When you hear a solid, dense sound, you've likely found a stud.
Using a Magnet: Studs are usually made of wood, but the nails or screws used to secure them to the frame are metal. Take a strong magnet and run it along the wall horizontally. When the magnet is attracted to the wall, it indicates the presence of a metal nail or screw, which means you've found a stud.
Looking for Outlets and Switches: Electrical boxes for outlets and switches are typically attached to studs for stability. Look for outlets or switches on the wall you're working on, and you'll likely find studs on either side of them, spaced 16 or 24 inches apart.
The Paper Trick: This method involves using a long, thin piece of paper or cardboard. Slide the paper along the wall horizontally, applying gentle pressure. When you encounter a stud, the paper will resist sliding smoothly over it. Mark the spot on the wall where the resistance is felt, and you've found a stud location.
Remember, these methods may require some practice and patience, but they can be effective alternatives when you don't have access to a dedicated stud finder tool.
The Knock Method
The knock method is a simple yet effective technique for locating studs without a stud finder tool. The principle behind this method is that the sound produced when knocking on a wall will vary depending on whether there is a stud behind the drywall or not.
To use the knock method, start by gently tapping or knocking on the wall surface with your knuckles or the end of a tool like a screwdriver handle. Listen carefully to the sound produced. When you knock over a stud, the sound will be solid and dull, as the vibrations are absorbed by the dense wooden stud behind the drywall. In contrast, when you knock on an area without a stud, the sound will be hollow and reverberant, as the vibrations travel through the air cavity between the studs.
Move horizontally across the wall, knocking every few inches, and pay close attention to the changes in sound. Mark the areas where the sound transitions from hollow to solid, as these points indicate the edges of the studs. Repeat this process vertically to confirm the stud locations and get a better sense of their width.
It's important to knock gently and consistently to avoid damaging the drywall or confusing the sound differences. Additionally, this method may be less effective on walls with insulation or other materials that can dampen the sound.
Using a Magnet
One effective method for locating studs without a dedicated stud finder tool is to use a strong magnet. Most studs are secured to the surrounding framing with nails or screws, and these metal fasteners can be detected by a powerful magnet.
To use this technique, you'll need a strong magnet, preferably a rare-earth or neodymium magnet, as these have a stronger magnetic field than traditional magnets. Start by holding the magnet flat against the wall and slowly move it horizontally, keeping it at the same height. As you move the magnet across the wall, you'll likely feel a slight pull or resistance when it passes over a nail or screw in the stud.
It's important to keep the magnet parallel to the wall and move it slowly to increase your chances of detecting the metal fasteners. You may need to repeat the process at different heights, as studs are typically spaced 16 or 24 inches apart.
One tip for effective magnet use is to mark the wall where you feel the pull or resistance, as this indicates the location of a stud. You can then continue moving the magnet horizontally to determine the approximate width of the stud.
Keep in mind that this method may not work as effectively on walls with thick plaster or drywall, as the increased distance between the magnet and the nails or screws can weaken the magnetic pull. Additionally, some studs may be secured with non-magnetic fasteners, such as specialized screws or nails, which won't be detected by a magnet.
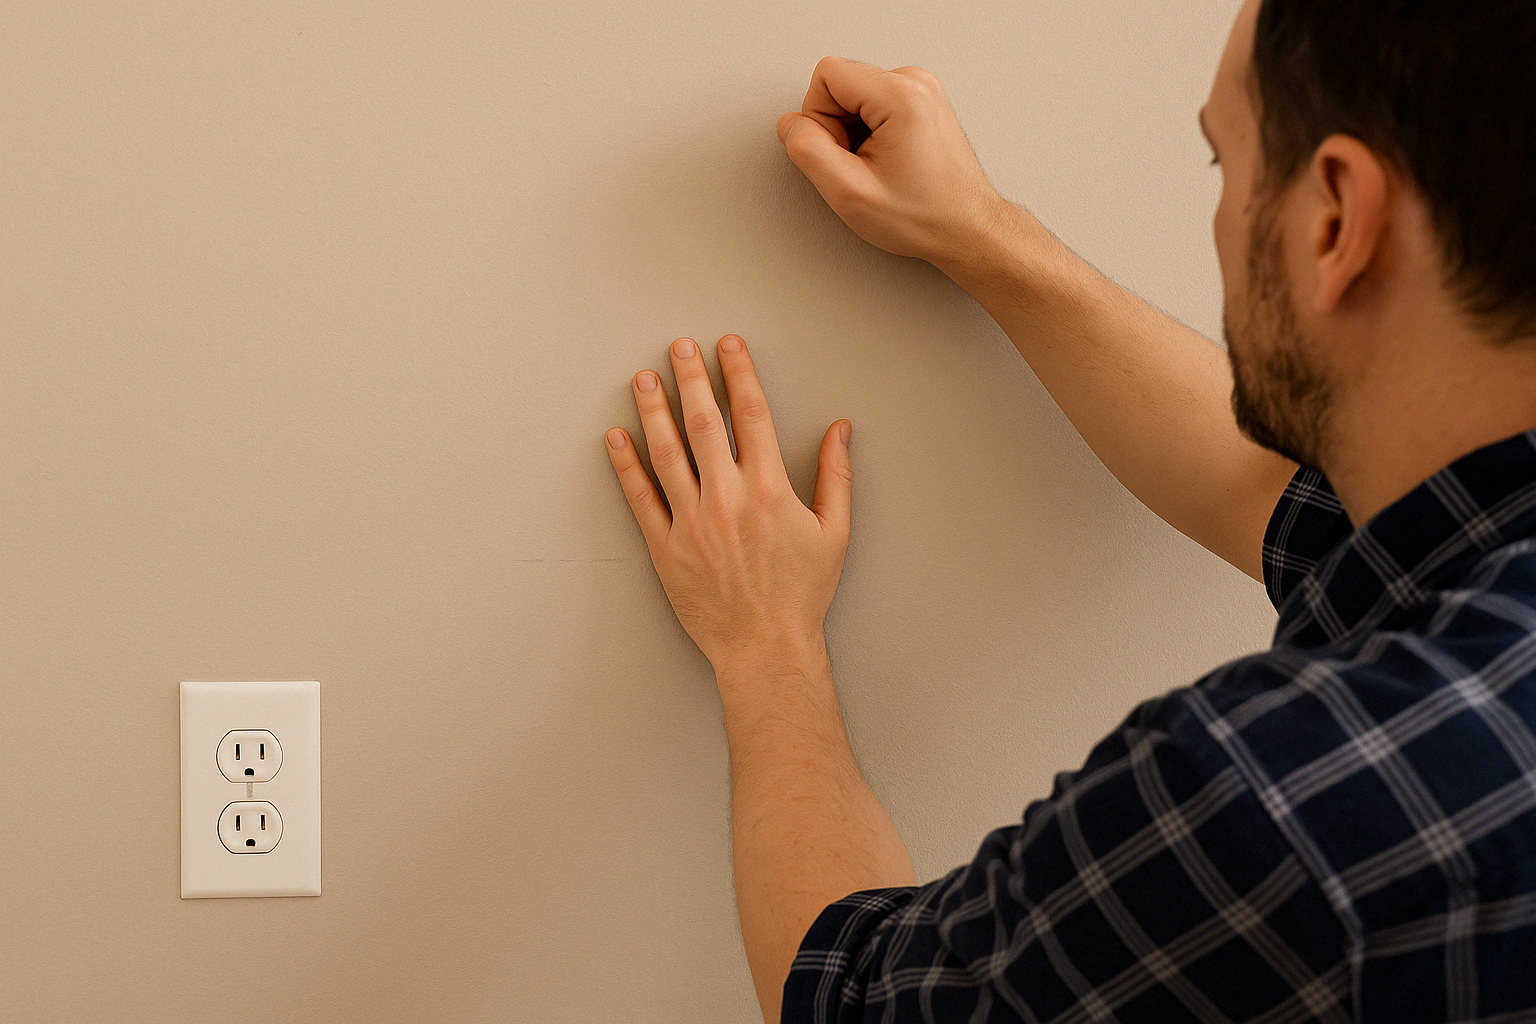
Looking for Outlets and Switches
Electrical outlets and light switches are almost always mounted directly onto the wooden studs inside the walls. This is done for stability and to ensure a secure attachment point. By locating outlets and switches on your walls, you can use them as a guide to find the nearby stud locations.
To use this method, start by visually inspecting the wall for any outlets or switches. Once you've found one, run your hands along the wall vertically above and below the outlet or switch. You should be able to feel a slight indentation or raised area where the outlet box is attached to the stud. This indentation typically extends a few inches above and below the outlet itself.
From there, you can measure 16 or 24 inches (standard stud spacing) in either direction to locate the next stud's approximate position. Keep in mind that walls with additional blocking or fire stops may have studs spaced closer together in certain areas.
While this method doesn't pinpoint the stud's exact edges, it provides a reliable starting point to begin your search in the vicinity of outlets and switches. It's a simple yet effective technique when you don't have access to a dedicated stud finder tool.
The Paper Trick
One simple yet effective technique for locating studs without a stud finder is the paper trick. This method involves sliding a thin piece of paper horizontally along the wall while applying gentle pressure. When the paper encounters a stud, you'll feel increased resistance or the paper may catch on any nails or screws protruding from the stud.
To use the paper trick, start by tearing off a strip of paper from a notebook or magazine. The paper should be thin enough to slide smoothly along the wall but sturdy enough to provide some resistance when encountering a stud. Holding the paper vertically against the wall, begin sliding it horizontally from one end of the wall to the other, applying light pressure.
As you move the paper across the wall, pay close attention to any changes in resistance or catching sensations. When the paper glides smoothly, you're likely moving over drywall or hollow spaces. However, when you feel increased drag or the paper snags slightly, it's an indication that you've encountered a stud.
Mark the location where the resistance is felt with a pencil or tape for reference. Continue sliding the paper along the wall, marking each stud you encounter. Studs are typically spaced 16 or 24 inches apart, so once you've located one, you can measure and mark the approximate locations of the others.
The paper trick is particularly useful for finding studs in areas where there are no visible outlets or switches to guide you. It's a simple, low-tech method that can be employed when you don't have access to specialized tools like stud finders.
Measuring and Marking Stud Locations
Once you've located a stud using one of the methods mentioned above, it's essential to accurately measure and mark its position for future reference or project needs. Here are some tips to help you with this process:
- Use a Pencil or Chalk: Mark the stud location using a pencil or chalk, as these can be easily erased or wiped off later. Avoid using permanent markers or pens, as they can leave unsightly marks on your walls.
- Measure from a Fixed Point: To ensure accurate measurements, choose a fixed point from which to measure, such as a corner or doorway. This will help you maintain consistency when locating and marking subsequent studs.
- Mark the Stud's Edges: Rather than just marking a single point, mark the edges of the stud to indicate its width. This will provide a better visual guide for your projects and prevent accidentally drilling or nailing into the wrong spot.
- Use a Stud Finder or Ruler: If you have a stud finder tool, you can use it to mark the stud's edges accurately. Alternatively, you can use a ruler or tape measure to mark the stud's width, typically 1.5 inches (3.8 cm) for standard wood studs.
- Label the Markings: Consider labeling your stud markings with additional information, such as the distance between studs or the direction they run (horizontal or vertical). This can be helpful for larger projects or when working with multiple walls.
- Take Photos or Make Diagrams: If you're working on a complex project or need to reference the stud locations later, consider taking photos or making diagrams of the marked areas. This can serve as a visual aid and prevent confusion or mistakes.
By accurately measuring and marking stud locations, you'll ensure that your projects are properly supported and avoid potential damage to your walls or structures.
When to Use a Stud Finder Tool
While the methods outlined above can be effective for locating studs without a dedicated stud finder tool, there are certain situations where using a stud finder may be more efficient or necessary. For larger projects or when traditional methods fail to provide clear results, a stud finder can save time and frustration.
If you're working on a project that requires locating multiple studs across a large area, such as when installing shelving or mounting a TV, using a stud finder can streamline the process. Instead of knocking or searching for outlets and switches, a stud finder can quickly and accurately pinpoint stud locations, allowing you to work more efficiently.
Additionally, if you're dealing with walls that have been extensively repaired or renovated, traditional methods may not be as reliable. In these cases, a stud finder can be invaluable, as it can detect studs through various materials and surface finishes.
Certain types of construction, such as older homes with plaster walls or newer homes with dense insulation, can also make it challenging to locate studs using traditional methods. In these situations, a stud finder can be a game-changer, ensuring accurate stud detection and preventing potential damage to your walls.
It's important to note that not all stud finders are created equal. Investing in a high-quality stud finder, particularly one that uses advanced technology like deep-scanning or multi-mode detection, can provide more accurate and reliable results, especially in challenging environments.
Safety Precautions
When searching for studs in your walls, it's crucial to take safety precautions to avoid potential hazards. One significant risk is accidentally hitting electrical wires or pipes concealed within the wall cavity. Before you begin knocking or using any tools, turn off the circuit breakers for the area you'll be working on to prevent electrical shocks. Additionally, be cautious of any potential plumbing pipes that may be running through the walls, as puncturing them could lead to water damage.
If you're unsure about the locations of wires or pipes, it's best to consult with a professional or refer to your home's blueprints or plans. Avoid making assumptions, as the layout of utilities can vary from one building to another. Always prioritize safety over convenience, and if you're uncomfortable or uncertain, seek expert assistance.
Furthermore, when using tools like magnets or hammers to locate studs, exercise care to prevent accidental damage to the wall surface or personal injury. Wear appropriate protective gear, such as safety glasses and gloves, and follow the manufacturer's instructions for any tools or equipment you're using.
Remember, taking the necessary safety precautions can help ensure a successful and incident-free stud-finding experience, protecting both you and your property from potential harm.
DIY Projects Requiring Stud Locations
Knowing the location of studs behind your drywall is crucial for many DIY projects around the house. Here are some common examples where you'll need to find and mark stud locations:
Hanging Shelves: Whether you're installing floating shelves, a bookcase, or a heavy-duty shelving unit, securely anchoring them to the studs is essential for safety and stability. Attempting to hang shelves solely on drywall can lead to disaster, with the shelves potentially ripping out of the wall and causing damage or injury.
Mounting TVs: With the rise of flat-screen TVs, wall-mounting has become increasingly popular. However, the weight of a TV can be substantial, and mounting it improperly can cause it to fall off the wall. Locating the studs and using appropriate mounting hardware is crucial for a secure and safe TV installation.
Installing Wall Anchors: If you need to hang heavy objects like mirrors, artwork, or even a punching bag, wall anchors can provide the necessary support. However, anchors installed solely in drywall may not hold up over time, especially with significant weight. Anchoring into the studs ensures a sturdy and long-lasting installation.
Hanging Railings or Grab Bars: For safety and accessibility purposes, grab bars or handrails are often installed in bathrooms, stairways, or other areas. These fixtures must be securely anchored into the studs to provide the necessary support and prevent potential accidents.
Building Shelving Units or Cabinets: When constructing built-in shelving units or cabinets, it's essential to anchor them securely to the studs. This not only ensures their stability but also allows them to support the weight of the items they'll hold without causing damage to the drywall.
Finding and marking stud locations is a fundamental step in many DIY projects, ensuring your installations are safe, secure, and long-lasting. By taking the time to locate the studs accurately, you can tackle these projects with confidence and achieve professional-looking results.
If you need some professional guidance for your project, be sure to sign up for a free account with DIYwithHelp.com. Once you have an account, you can search our site (or fill out a project request form) and connect with expert tradespeople who are willing to lend their advice over scheduled video calls.


