By DIYwithHelp Writing Staff
As we move increasingly into a wireless world, the stability and speed of a wired internet connection remain unparalleled. Whether you're facing a slow Wi-Fi connection, or you just want a more stable option for activities like gaming or video streaming, learning how to connect an ethernet cable to a PC is crucial. This article will guide you through the entire process, ensuring you get the best possible connection.

Introduction
Are you tired of inconsistent Wi-Fi signals disrupting your work or gaming sessions? If so, it's time to consider a more stable and reliable solution—using an ethernet cable. This article offers a thorough, step-by-step guide to connecting an ethernet cable to your PC, ensuring you achieve optimal internet performance. Whether you are tech-savvy or a complete newcomer, this guide will provide you with all the information you need.
Why Opt for an Ethernet Connection?
Wi-Fi connections are undoubtedly convenient, but they are often plagued by issues such as interference, signal degradation, and lower speeds. An ethernet connection, on the other hand, offers:
- Stable Connection: Unlike Wi-Fi, ethernet connections are not prone to interruptions due to physical barriers or distance.
- Higher Speed: Ethernet typically offers faster internet speeds, essential for high-bandwidth activities like streaming and online gaming.
- Reduced Latency: Essential for online gaming and real-time applications.
These benefits make understanding how to set up wired internet on a computer invaluable.
Requirements for Connecting Ethernet to a Computer
Before diving into the actual ethernet cable setup, you will need the following components:
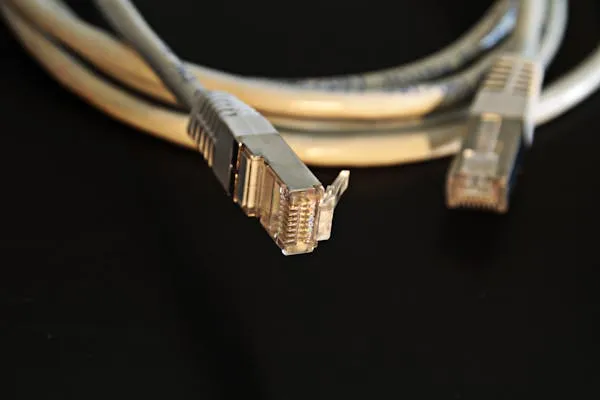
- Ethernet Cable: Ensure you have a reliable Cat5e, Cat6, or Cat7 cable.
- Modem/Router: An active internet connection from your Internet Service Provider (ISP).
- Ethernet Port on PC: If your computer lacks an ethernet port, you may need a USB-to-ethernet adapter.
Step-by-Step Guide to Connecting Ethernet Cable to PC
Identify the Ethernet Port
The first step in any ethernet connection guide is to identify the ethernet port on your PC. Most desktop computers have an ethernet port located at the rear, often indicated by a small network icon. If you're using a laptop, the port might be on the side.
Check Your Ethernet Cable
Ensure your ethernet cable is in good condition. Damaged cables can result in poor connectivity or no connection at all. Cat5e, Cat6, and Cat7 cables are recommended for optimal performance.
Connect the Ethernet Cable to the Modem or Router
Locate an available LAN port on your modem or router. Insert one end of the ethernet cable into this port, ensuring it clicks into place.
Plug Ethernet into Desktop
Take the free end of the ethernet cable and insert it into the ethernet port on your computer. Listen for a click or look for an LED indicator to confirm the connection. If your router is not located near your preferred computer location, you can use this article to run your cable through your house: Link.
Configuring Network Settings
After physically connecting the ethernet cable, your computer should ideally recognize the connection automatically. However, sometimes you may need to manually configure the network settings:
- Windows:some text
- Go to Control Panel > Network and Internet > Network and Sharing Center.
- Select Change Adapter Settings.
- Right-click on the ethernet connection and choose Properties.
- Ensure that Internet Protocol Version 4 (TCP/IPv4) and Internet Protocol Version 6 (TCP/IPv6) are selected.
- Mac:some text
- Open System Preferences > Network.
- Select Ethernet from the list of connections on the left.
- Click Advanced and review the network settings to ensure proper configuration.
Congratulations, you have successfully set up your wired internet on a computer!
Troubleshooting Common Issues
Despite a flawless setup, you might encounter some issues. Here are some common problems and solutions:
- No Internet Access: Verify all cable connections and reboot your modem/router.
- Limited or No Connectivity: Ensure that DHCP is enabled on your router.
- Intermittent Connection: Inspect the cable for any visible damage and replace if necessary.
Best Methods to Connect PC to Ethernet
While the basic process to connect ethernet to a computer is straightforward, here are some additional methods to ensure a seamless setup:
- Cable Management: Use cable organizers to keep your setup tidy.
- Quality of Cable: Opt for high-quality, shielded ethernet cables to prevent interference.
- Network Switches: If you have multiple devices to connect, consider using a network switch.
Improving Internet Speed with Ethernet
If you are looking to enhance your internet speed further, here are some tips:
- Update Network Drivers: Ensure your network drivers are up-to-date.
- High-Speed Plan: Opt for a high-speed internet plan from your ISP.
- Router Placement: Place your router in a central location to reduce latency.
Conclusion
Learning how to connect an ethernet cable to a PC is an invaluable skill that ensures you enjoy a fast, stable, and reliable internet connection. From understanding the components you need to troubleshooting common issues, this guide provides a comprehensive resource for setting up your wired internet connection.
By opting for ethernet, you can significantly improve your internet speed and reliability, making it the best method for those who depend heavily on a stable connection. Whether you're setting up a home office, gaming, or streaming, a wired connection ensures you never miss a beat.
Feel free to share this step-by-step guide to connecting ethernet cable to a PC with your friends and family, enhancing their internet experience as well. Happy browsing!
If you need to get in touch with a professional for your wallpaper, be sure to sign up for DIYwithHelp for free here. Our service can connect you with an expert tradesperson in no time


