

How Long Does It Take to Install A Hardwood Floor? A Comprehensive Guide
Installing hardwood floors in your home to get a warm aesthetic sense and elegance is like the dream of every DIY enthusiast. But here's the most asked question: "How long does it take to install hardwood floors?"
The timeline of installing hardwood floors depends on many factors, from the type of flooring to the size of the room. So, buckle up because we will explain how much time it takes to install hardwood floors and the best and most time-saving ways of installing one.
How long does it take to install a hardwood floor?
Hardwood flooring installation takes approximately 2-3 days in a room ranging from 750 to 1000 square feet. However, several factors can influence this timeframe. If you choose unfinished wood, be prepared to put in more time.
Also, the condition of the subfloor is very important. If it's experiencing dampness, expect the timeline to be extended. It all comes down to ensuring that your hardwood investment thrives in optimal conditions.
Now, the entire installation process may take around 2-4 weeks. The process starts with floor preparation and then moves on to installation, retouching, and final preparation. So, from the initial foundation to the final touches, devoting time and attention to each step will ensure a hardwood floor that will stand the test of time.
Types of wood flooring
One of the most important time-deciding factors is the wood flooring used. There are two types of wood flooring:
- Prefinished wood
- Unfinished wood
Prefinished Wood
Choosing prefinished hardwood flooring is like going through the fast lane for your project. This type of wood is easier to install because it receives all the necessary treatments, such as staining and a protective spray, at the factory. It saves time from the start.
Order these hardwood floors ahead of time. This would avoid any unnecessary delays. When placing your order, choose a reputable vendor - it will make all the difference. Prefinished wood eliminates the need for additional drying time. So, when time is of the essence, prefinished hardwood has your back, ensuring a quick and painless upgrade to your space.
Unfinished wood
Unfinished wood is in its natural, unfinished state. This extends the installation process. It arrives straight from basic cutting, shaping, and drying. Unfinished wood has a natural look with authentic grain and texture. The additional installation time includes necessary steps such as sanding and drying. This is done to bring out the natural color and patterns in the wood.
The natural, unaltered appearance leaves plenty of room for your creativity to flourish. Unfinished wood is versatile and can be used for furniture, home decor, and construction.
Unlike prefinished alternatives, you can customize it with stains, paints, or clear coatings to achieve the desired aesthetic. So, if you crave creative expression, unfinished wood is the canvas for your vision.
Factors affecting timelines for hardwood floor installation
Let's dive into the various factors that significantly impact the successful installation of hardwood flooring:
1. Subfloor condition
The condition of your subfloor is a make-or-break factor. Eliminating any signs of rot is crucial to prevent mold growth beneath the hardwood flooring. A wet or damp subfloor can become a breeding ground for pathogens. It's essential to vacuum and dry the subfloor thoroughly.
2. Size of the room
The size of the project directly influences the timeline for hardwood flooring installation. Naturally, larger floor spaces demand more time for installation. Whether it's a cozy nook or a spacious living area, the size of the room plays a significant role in determining the overall time investment.
3. Flooring type
The type of hardwood flooring chosen, whether prefinished or unfinished, is a key player in the installation timeline. Prefinished wood, having undergone treatments at the factory, speeds up the process. On the other hand, unfinished wood requires more time.
4. Preparing the space
Preparing the space before installation is crucial. This includes moving furniture away from the designated area. Clearing the workspace beforehand ensures a smooth, quick, and uninterrupted installation process.
4. Workforce
The number of individuals involved in the installation process matters. Whether it's a solo endeavor or a team effort, the workforce directly influences the efficiency of the installation. Having adequate hands on deck can expedite the overall timeline.
Getting materials and tools for hardwood floor installation
Before diving into the installation process, let's gather the required tools and materials. Here's what you'll need:
Materials
- Hardwood Flooring: Purchase enough hardwood flooring to cover the square footage of your space, accounting for any extra in case of errors.
- Underlayment: A suitable underlayment to provide cushioning and reduce noise.
- Moisture Barrier: If necessary, a moisture barrier to protect against dampness from the subfloor.
- Adhesive or Nails: Depending on the installation method, you'll need either hardwood flooring adhesive or nails.
- Wood Filler: For filling gaps and imperfections in the hardwood.
- Transition Strips: If transitioning between different flooring types or areas.
Tools
- Circular Saw or Miter Saw: Cut the hardwood planks to fit your space.
- Table Saw: If you must rip the boards for a custom fit.
- Nail Gun or Flooring Nailer: Use nails to secure the hardwood to the subfloor.
- Adhesive Applicator: If opting for the adhesive method.
- Tape Measure: Essential for accurate measurements.
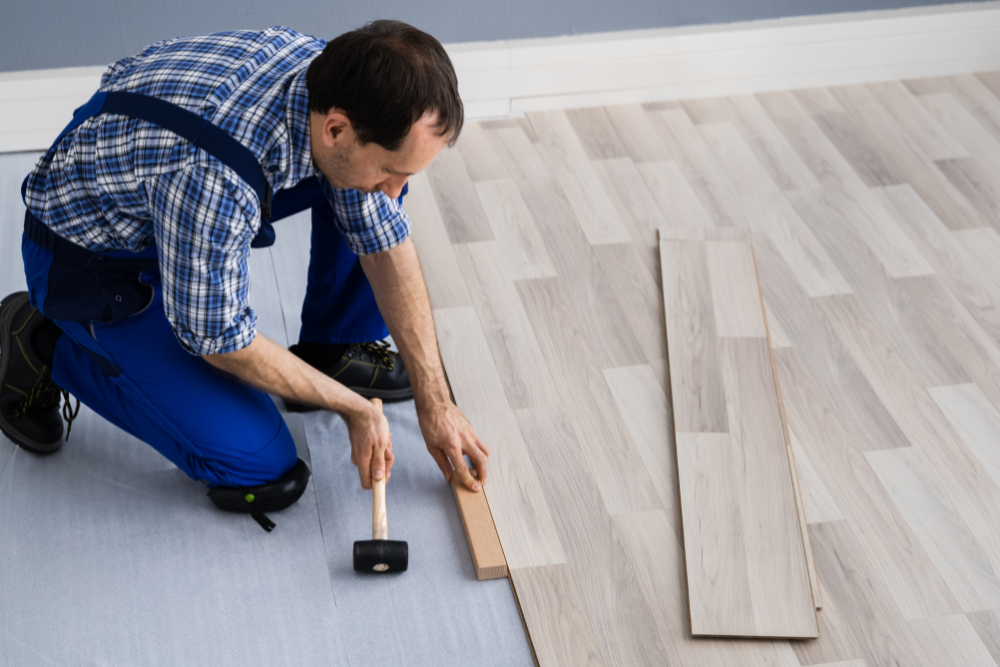
- Rubber Mallet: For gently tapping the planks into place.
- Chalk Line: To maintain straight and aligned rows during installation.
- Spacers: Placed against the walls to allow for expansion.
- Tapping Block: Used with the rubber mallet to ensure a snug fit.
- Safety Gear: This includes goggles and knee pads for protection.
The right materials and tools at the outset set the stage for a successful hardwood floor installation. With everything in hand, you can move on to the step-by-step installation process.
How to install a hardwood floor?
Now, we will discuss the thorough process of installing a DIY hard floor to make your dream come true.
Preparation
Begin by clearing the room of furniture and ensuring the subfloor is clean, level, and free of any protrusions. Inspect for potential issues and address them before laying the hardwood.
Acclimation
Allow the hardwood flooring to acclimate to the room's temperature and humidity for at least 48 hours. This minimizes the risk of expansion or contraction after installation.
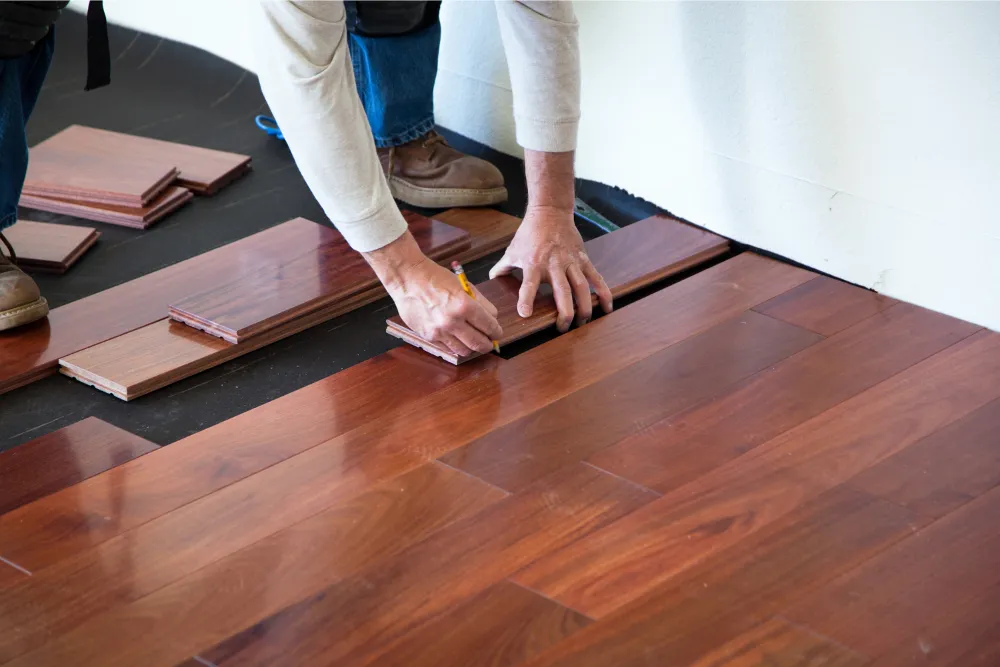
Installation
Start laying the boards from the center of the room, leaving space around the edges for expansion. Use the chosen installation method, such as nails or adhesive, to ensure each plank fits perfectly against the previous one.
Finishing
Complete the installation, installing transition strips where needed and filling any gaps or imperfections with wood filler. This ensures a polished appearance.
Drying
Allow the installed hardwood to dry and settle for at least 24 hours. This step ensures the wood adapts to its new environment, minimizing the risk of issues.
Cleaning
After the floor has properly dried, thoroughly clean the surface to remove any debris, adhesive residue, or dust. This sets the stage for enjoying your newly installed hardwood floor in its pristine condition.
Wrap up
We hope this guide has provided useful insight into the complex process of installing hardwood flooring, answering the question, "How long does it take to install a hardwood floor?" Each step contributes to your hardwood floor's longevity and aesthetic appeal, from thorough preparation and acclimation to hands-on installation and careful finishing touches. May your hardwood floor add warmth, beauty, and a personal touch to your home.
Have fun installing it!
Frequently Asked Questions
1. How long does it take to install hardwood flooring?
The timeline for hardwood flooring installation can vary based on factors like room size, flooring type (prefinished or unfinished), and subfloor conditions. On average, a room spanning 750 to 1000 square feet may take 2-3 days.
2. What factors should I consider before installing hardwood flooring?
Before diving into installation, consider the condition of your subfloor, ensuring it's free from rot to prevent mold growth. Take room size into account, as larger spaces naturally require more time.
3. Can I install hardwood flooring myself, or should I hire professionals?
DIY installation is possible, especially with prefinished wood. However, it requires careful planning, proper tools, and knowledge of the installation process. Hiring professionals will ensure a smoother and more efficient installation for unfinished wood.
For more DIY tips and tricks, DIYwithHelp have got you covered…
If you need some professional guidance for your project, be sure to sign up for a free account with DIYwithHelp.com. Once you have an account, you can search our site (or fill out a project request form) and connect with expert tradespeople who are willing to lend their advice over scheduled video-calls.


